|
The Zoom Frame tool
|   |
|
The Zoom Frame tool
| |
To create a Zoom Frame vector, select the Zoom Frame tool and drag from the upper-left corner of the inner zoom rectangle to the lower-right corner of the inner zoom rectangle:
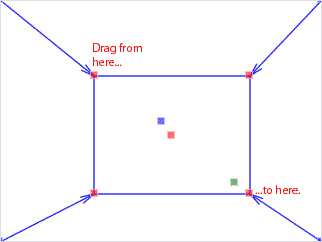
The Zoom Frame tool creates two rectangles, and joins their corners with arrows. The outer zoom rectangle is initially created outside the overall frame border, but you can shrink it by dragging inside its corners or move it by dragging its center point (the center blue handle).
The blue handles are drawn at the corners and center of the "from" rectangle, and the red handles are drawn at the corners and center of the "to" rectangle.
The arrows are automatically drawn so that they don't intersect any of the rectangles' lines; there are no controls for them. Here are some examples of different ways the arrows can appear:
You can reverse the direction of the arrows by double-clicking anywhere, or by checking the Reverse Direction box in the Zoom Frame Properties dialog. This also reverses the colors of the handles, so that the blue handles are always on the "from" rectangle.
Automatic Zoom
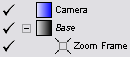
By default, Zoom Frames under the Camera layer are interpreted as camera movements in animatics. This is called Automatic Zoom, though it can also be used for other camera moves, such as pans. A blue dot is drawn over any Zoom Frame that will be automatically animated:
Zoom Frame is not under Camera - not animated
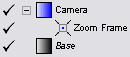
Zoom Frame is under Camera and will be animated
You can control the timing of the animated zoom frame with the Animation controls in the Zoom Frame Properties dialog.
Sizing and snapping
The aspect ratio of a Zoom Frame rectangle is constrained by default to that of the story. (This is set by the Default frame size in the Story Properties dialog.)
Holding the Shift key down while resizing allows you to change the aspect ratio, and displays the resulting aspect ratio while you drag.
Holding the Control key down while dragging a node snaps it to other points in the frame and snaps the aspect ratio to the story's default. You may get best results by using Shift whenever you use Control.
Holding the Alt key down while resizing resizes around the center instead of the opposite corner.
Multiple Zoom Frames
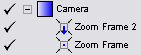
You can use multiple Zoom Frame vectors in a single frame to assemble more complex camera movements from single moves. This is particularly useful in combination with Automatic Zoom.
When you make a second Zoom Frame under a Camera layer, it is placed above the first in the Layers palette, as usual with vectors. The first (lower) vector comes first in time order, followed by the second (higher) vector. The vectors' icons are also changed to indicate this order:

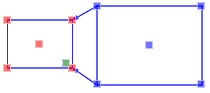
The Zoom Frames are also linked so that the "to" rectangle in the first Zoom Frame (the one with red node boxes) and the "from" rectangle in the second Zoom Frame (the one with blue node boxes) move together:
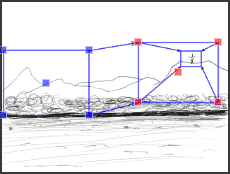
Editing the first Zoom Frame (pan right)
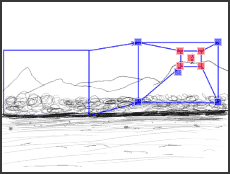
Editing the second Zoom Frame (zoom in)
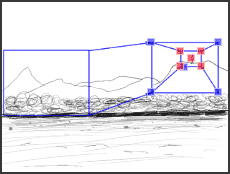
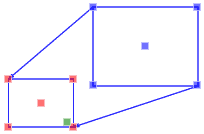
Moved the "from" (blue) rectangle in the second Zoom Frame; the first Zoom Frame is linked.
If you reverse the order of the Zoom Frames with the Zoom Frame Properties dialog or by double-clicking while editing one of them, the reversed order is shown in the Layers palette:
Note that Zoom Frames in other layers than the one designated in the Camera tab of the Preferences dialog are not linked, do not have the blue markers in the Layers palette, and are not used for Automatic Zoom.