|
Animating the camera
|   |
While some dynamic media or stylistic choices may preclude re-framing a shot as it progresses, most video and movie productions involve some kind of camera movement - zooms, pans, dollies, cranes, etc.
Camera movement in a screenplay
Camera movement can be represented in a screenplay with phrases like "PAN RIGHT" or "ZOOM IN" (conventionally all-uppercase). Whether or not you start with a screenplay before creating storyboards, typing these phrases into Springboard's frame text box is a quick way to represent camera moves, and can be particularly useful if you want to work with a printout of just the frame text, without accompanying images.
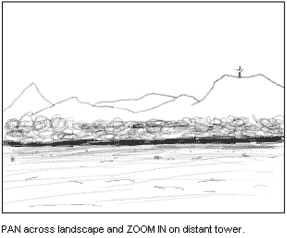
A frame with a camera movement instruction in its frame text
Camera movement in a storyboard
The most common way to represent camera movement in a storyboard use graphical arrows and boxes, with some loose conventions to indicate particular moves.
In general, there are two sets of conventions for representing camera moves: those that use a single thick arrow set in three-dimensional or "story" space, and those that use frame boxes in two-dimensional or "frame" space. For example:
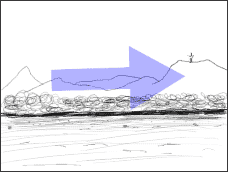
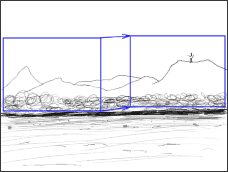
Pan right using thick arrow and using frame boxes
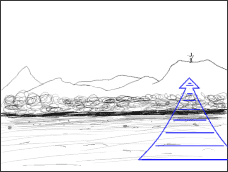
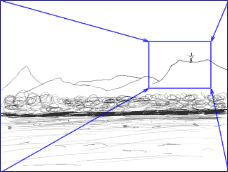
Zoom in using thick arrow and using frame boxes
Springboard's thick arrow and Zoom Frame tools are designed to help represent these conventions.
In general, the thick arrow approach is compact and suggestive: it indicates the direction the camera is moving, but not exactly how far. The frame box approach is more precise, because it shows exactly where the frame begins and ends, but it sometimes takes up more visual space.
Camera movement in an animatic
When you want to view an animatic of your production, you could simply cut between frames and show camera movement with the same graphical symbols used in the static storyboard. But, it's more direct to simulate the actual camera moves dynamically.
Springboard can automatically interpret Zoom Frame vectors in the Camera layer as camera moves, so that the pan pictured above looks something like this when it's viewed in the Movie View or exported to a movie file:

Pan right, shown dynamically in an animatic
See the Automatic Zoom feature for more details.
Productive ways to work with camera movement
The alternatives described above can be used in different combinations to suit your personal style or project requirements. Here we'll suggest two different approaches that you could choose as starting points:
In this approach, you would start by typing short phrases in the frame text area as you rough out your frame drawings for a production (or for a particular sequence). Then, as the drawings take shape, add thick arrows to get a more visual feel for the camera moves. Finally, replace the thick arrows with Zoom Frames to express the move more precisely and show it dynamically in animatics.
Note that you can also mix thick arrows (or other symbols drawn freehand) with Zoom Frames. If you hide a Zoom Frame vector, it will still be animated as long as "Animate camera" is still checked for the frame, so you could get a precise and dynamic camera move in an animatic while still showing a simple or customized graphic in your printed storyboards if you prefer.
It may be simpler to use a Zoom Frame from the start and refine it successively rather than successively refine text phrases to arrows to Zoom Frames. You may also find that working with a Zoom Frame in place as you draw, and adjusting both the Zoom Frame and the drawing as you refine a sequence, helps support your visual thinking process.
Springboard can support both of these approaches comfortably, and there's no need to make a decision ahead of time.