|
The Move Layer tool
|   |
The Move Layer tool ![]() lets you move, resize, rotate, and shear the current bitmap layer. It is not available for vector layers.
lets you move, resize, rotate, and shear the current bitmap layer. It is not available for vector layers.
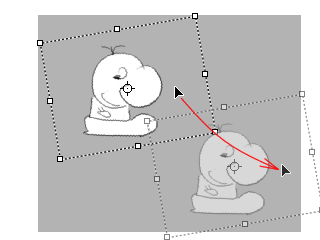
Drag inside the layer to move it:
Drag any of the handles to resize the layer:
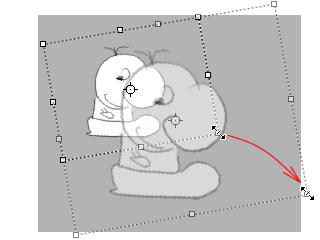
Use Shift while resizing to constrain the aspect ratio and Alt to resize around the pivot point instead of from the opposite corner.
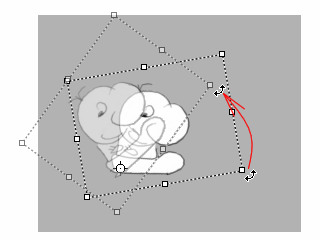
Drag outside the layer to rotate it around its pivot point:
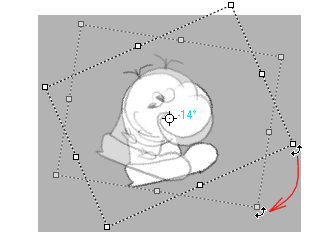
When creating animation, it may matter whether a rotation is positive or negative - e.g., a half-turn clockwise vs. a half-turn counter-clockwise. Drag the layer in the direction you need; the angle is displayed in light blue next to the pivot point, with positive rotation counter-clockwise.
You can rotate a layer multiple times by simply using the handle to "wind it up." Multiple revolutions are displayed with an R for the count of complete revolutions, like "1R + 25°" for a full revolution plus 25°, or 385°. Use multiple revolutions to animate things like rolling balls or wheels.
By default, the pivot point is located at the center of the layer. Drag the pivot point indicator to move the pivot point:
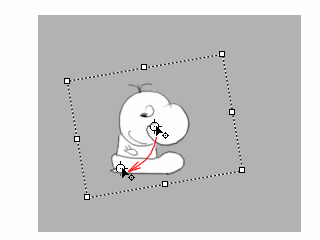
The layer will then rotate and scale around the pivot point's new position:
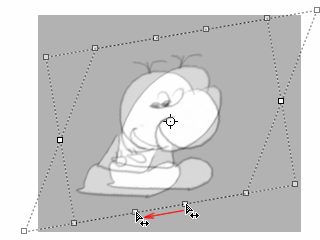
Hold down Ctrl while dragging one of the side nodes to shear or skew the layer:
To return a layer to its default size and position, use the Reset Layer Position command.
The V key toggles between the Move Layer tool and the last-used drawing tool.
You can use the arrow keys to nudge the layer by one pixel. Holding down the Shift key while using the arrow keys nudges the layer by 20 pixels.
Changes made with the Move Layer tool take effect at the current frame's poster time. Use the Frame Animation View to change the poster time and create animated frames.
While the Move Layer tool is selected, the Tool Weight Slider becomes the Layer Opacity Slider.